Getting Started with i-grader
What is i-grader?
i-grader enables review of student answers and assigment of grades for responses during polling sessions. Student grade data can be exported from i-grader and uploaded to ANGEL.
Start i-grader
- Before launching i-grader, be sure to the exit the i>clicker application if it was previously running.
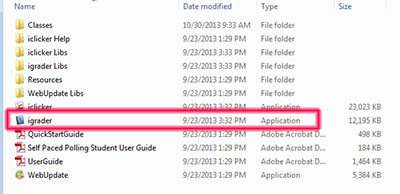
- To start i-grader, double-click the igrader.exe file in the folder that contains the clicker software.
- The Welcome to i-grader window will open.
Select a Course and Polling Session
- Select the appropriate course and click Choose.
- If you have not yet created a course, exit i-grader and create the course with i>clicker. See iClicker getting started for faculty »
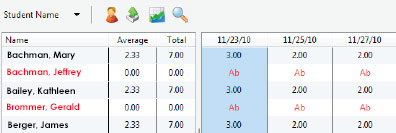
- A list of student names will be displayed in the left column.
- The dates on which voting sessions were implemented will be at the top of the results columns on the right.
Viewing Student Names
-
- Elect to view students by either Student ID or Last Name via the dropdown menu at the top of the left column.
- Registered students appear in black.
- Unregistered students appear in red.
- Recorded votes of unregistered students are identified by their i>clicker remote ID and appear at the end of the list in red.
Viewing Polling Sessions
- Each i-clicker session is labeled by a polling session date.
-
If two sessions were held in the same course on the same date, they will be shown separately.
- Tip: Choose Resume Last Session from the i-clicker Home Page to append additional polling data to a previous session during the same class.
Synchronizing Web Registrations
- After students have registered their clickers and at least one polling session has been implemented, update the registration information for the course. (An Internet connection is required.)
- Click the Sync... button on the i-grader Home Page.
- The Synchronize Web Registrations window opens. Click Continue.
- Course roster information will be synchronized with students' online registrations.
- After the process completes, click Close.
View Session Summary
- Double-click within the column which corresponds to the session to be graded.
- The Session Summary window opens for:
- Viewing question information
- Entry of point values for question responses
- Deletion of questions from the session.

Viewing Questions in the Session Summary Window
- The first question of the session is displayed.
- Use the arrows below the chart advance through questions.
- Take note of the thumbnail image of a screen capture which identifies the question associated with the poll. To view the image, click View Screenshot.
- To view a response chart for a question, click View Chart.
Assigning Point Values for Responses
- If point values for correct answers were already configured under My Settings for the course, select the check box next to the correct response for the displayed question.
- Correct responses will automatically be awarded the indicated number of points.
- Within the Session Summary, credit or partial credit for any response can be awarded by editing point values in the Points field adjacent to the response.
- Navigate through all questions to indicate correct answers and assign points to be awarded.
- Click Set and Close after reviewing all questions.
Deleting a Question from a Session
- Navigate to the question to be removed from the session.
- Click Delete Question.
- The question is still available, but points will not be applied for the session.
- A red Deleted message will be displayed on the screenshot for the question.
- The Delete Question button changes to Undelete Question.
- To restore the question for the session, click Undelete Question.