Getting Started with i-clicker in your classroom
Learn where to get the software, how to set up your course, and configure basic settings for your course.
Obtain a copy of the i>clicker software.
The software program which runs i>clickers can be copied to a folder on a flash drive. This allows you to run it from any computer in any classroom.
You can always find the latest version of the program at the i-clicker website.
- Download the software »
- You will be prompted to download a .zip archive. Download the archive.
- Open the .zip archive and extract the entire folder (i.e. iclicker Win v6.3.1) to your flash drive.
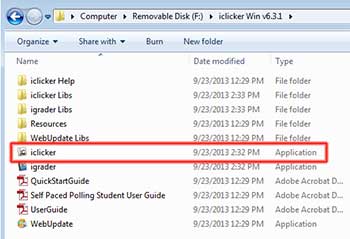
- From your flash drive, open the folder to see the contents.
Run the i-clicker software.
To run the software, double-click on the iclicker Application file.
Set up your course.
The Welcome screen will open. The first time you use i-clicker for a course, you will need to set the course within the program.
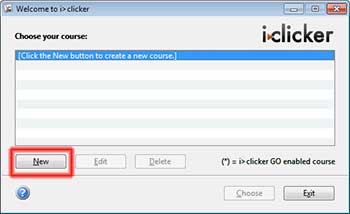
- Click the New button to enter course info.
- Enter enough information about the course to allow your students to select the course from a list (Course Name, Number, Section).
- The information you enter will be linked together with dashes to identify the course in i-clicker. For instance Math 110, section 001 will be Math-110-001.
- The course name will appear in the list.
- Select the course and click Choose.
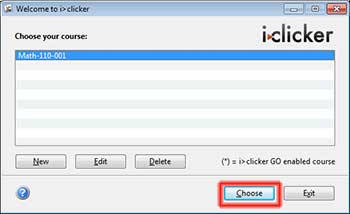
The course will open.
Prior to starting your course, configure your course by clicking on My Settings.
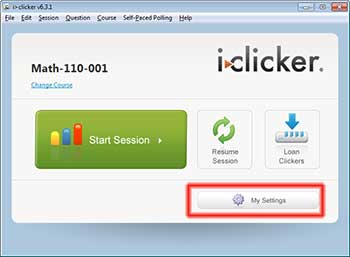
Configure clicker settings for your course.
Review the i-clicker User Guide at the company's website for up-to-date details on how to configure your course.
You can elect to configure settings for the Course or for the Session.
Here are some of the settings you might want to configure:
General
- Instructor Remote ID: If you are using a blue instructor remote to control the software as you walk around the classroom, enter the Remote ID from the back of the clicker.
- Frequency Code: Each classroom has a specific frequency code. The code for your classroom will be taped to the podium. Enter the two-letter combination of the characters A, B, C, or D.
i>clicker GO
- Mobile devices: To allow students to respond via a laptop or mobile phone in your course, click Edit i-clicker GO Settings to register your course for i>clicker GO.
LMS/Reg
- Learning Management System: Select ANGEL under this tab to allow for importing clicker scores into ANGEL.
Polling
- Polling Timer: The default timer counts up from zero to 30 seconds for each question. The timer can be customized to count down or to allow a shorter or longer response time.
Scoring
- Participation points: Enter settings to award points for participation and how many responses will denote sufficient participation. This option can be used for tracking attendance.
- Performance points: Select options to award default points for a response--even if incorrect. Designate how many points a correct response will earn, or a maximum number of points that can be earned in a session.
Results
- Multiple choice: Designate either a color or monochrome display
- Numeric: Choose either a bar chart or histogram.
- Alphanumeric: Enter the number of characters to display
- Correct answer: Designate whether the correct answer will display immediately upon ending the poll, or upon a manual prompt.
Base Display
- Configure the display of results on the base station for multiple choice, numeric, or alphanumeric responses.
Demographics
- Add pre-built questions about Demographics (age, accessibility, income, student status, etc.). After students have respond to demographic questions, their responses to subsequent clicker questions can be filtered by demographic.